Guide
How to Scan Photo Negatives at Home (Step-by-Step)
Learn how to scan photo negatives at home. This guide covers everything from preparing film to choosing a scanner and editing for perfect digital archives.
Published Dec 8, 2025 · Updated Dec 8, 2025
TL;DR
- Handle negatives by the edges, dust them gently, and never touch the emulsion.
- Choose your workflow: dedicated film scanner, flatbed with film holder, or smartphone plus backlight.
- Scan 35mm at 2400–4000 DPI, save masters as TIFF, and keep JPEGs for sharing.
- Invert, color-correct, and label files so you never have to rescan the same strip.
- Related: our broader slides & negatives scanning guide and photo restoration guide.
Photo negatives are the original, high-detail source for your favorite images. While prints fade, curl, and discolor over time, the negative often preserves far more detail and dynamic range than you ever see on paper. Learning how to scan photo negatives at home lets you unlock that quality, back up fragile film, and share memories with family without handing irreplaceable originals to the mail.
In this guide, you’ll walk through a practical, home-friendly workflow: preparing and cleaning your film, choosing the right scanning method, dialing in resolution and color, and finally editing and organizing your files for long-term safekeeping. We’ll focus on simple tools you can use today, whether you own a flatbed scanner, a dedicated film scanner, or just a smartphone and a basic light source.
If you’re starting with prints as well as film, pair this walkthrough with our beginner guide to scanning old photos and the digitize slides & negatives hub for a complete view of your options.
Why digitizing your negatives is worth it
Negatives aren’t just backups — they’re the master version of your photo. A well-preserved strip contains more highlight and shadow detail than any print ever could. When you scan directly from film, you can recover subtle tones in clouds, clothing, and skin that were completely lost in the original lab print.
You also gain a powerful form of insurance. Film is vulnerable to scratches, mold, humidity, and accidental handling. Once a negative is digitized at a high resolution, you have a long-lasting “digital master” you can store in multiple places and revisit without ever touching the physical strip again.
Finally, scanning negatives often surfaces photos you’ve never seen. Many families have envelopes of film for which no prints were ever made. Bringing those frames into a clean, searchable digital archive is one of the most satisfying parts of this project.
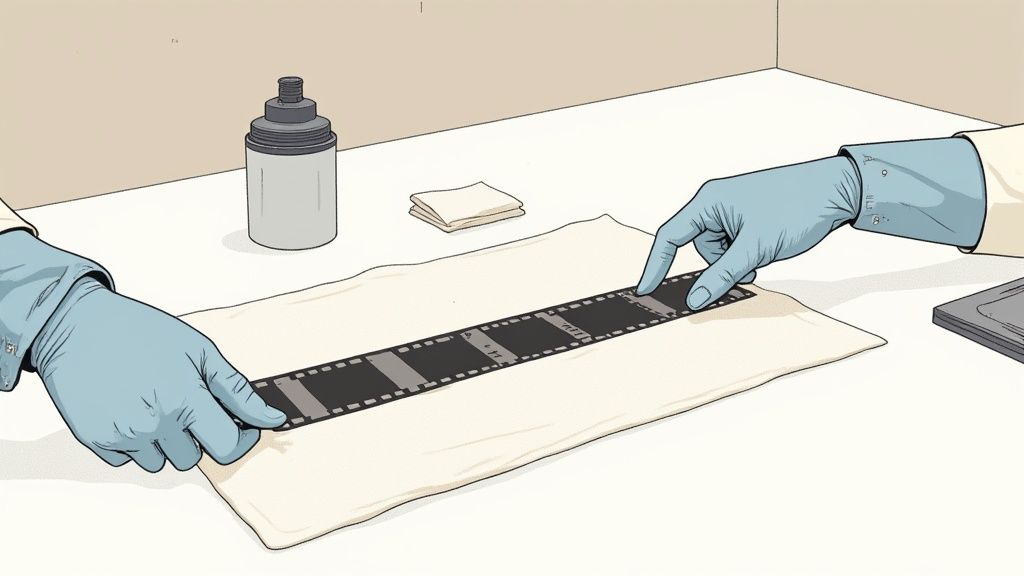
1) Prepare your workspace and film
A great scan starts before you hit the Scan button. Dust, fingerprints, and scratches all get magnified when you digitize film, so investing a little time in prep saves hours of cleanup later.
Set up a clean, bright workspace
- Choose a flat, stable surface such as a desk or dining table.
- Wipe it down with a slightly damp, lint-free cloth to remove loose dust.
- Add a bright desk lamp or position yourself near a large window with indirect light so you can clearly see each frame.
- Lay down a clean, plain surface (white or black card works well) to make dust and defects easier to spot.
Gather safe handling tools
Film emulsion is soft and easy to damage. Assemble a simple kit:
- Lint-free gloves (cotton or nitrile) to avoid fingerprints and skin oils.
- Hand air blower (not canned air, which can be too strong) for dust.
- Antistatic, soft brush for stubborn particles.
- Lint-free wipes or microfiber cloths.
- Optional: a small loupe or magnifying glass to inspect details.
Always handle negatives only by the edges, and never drag them across a rough surface.
Clean without scratching
Work one strip at a time:
- Hold the negative by the edges and use the blower to remove loose dust from both sides.
- If particles remain, lightly sweep with the antistatic brush in one direction.
- For sticky marks, consider a dedicated film cleaner (such as PEC-12) and lint-free pad, following the manufacturer’s instructions carefully. Never use household glass cleaner or tap water — both can damage the emulsion.
The goal is not perfection but prevention: remove obvious dust and grime so your scanner or camera isn’t amplifying defects.
Sort and label before you scan
Organization matters as much as image quality. Before scanning:
- Group strips by event, year, or roll number.
- Use acid-free envelopes or sleeves and label them clearly.
- Make a quick note of any special frames (weddings, graduations, trips) you want to prioritize.
When you later name your digital files, you’ll be glad you already thought about the story each strip belongs to.
2) Choose your scanning method
You can scan negatives successfully with different setups. The right choice depends on your budget, how many frames you have, and how picky you are about quality.
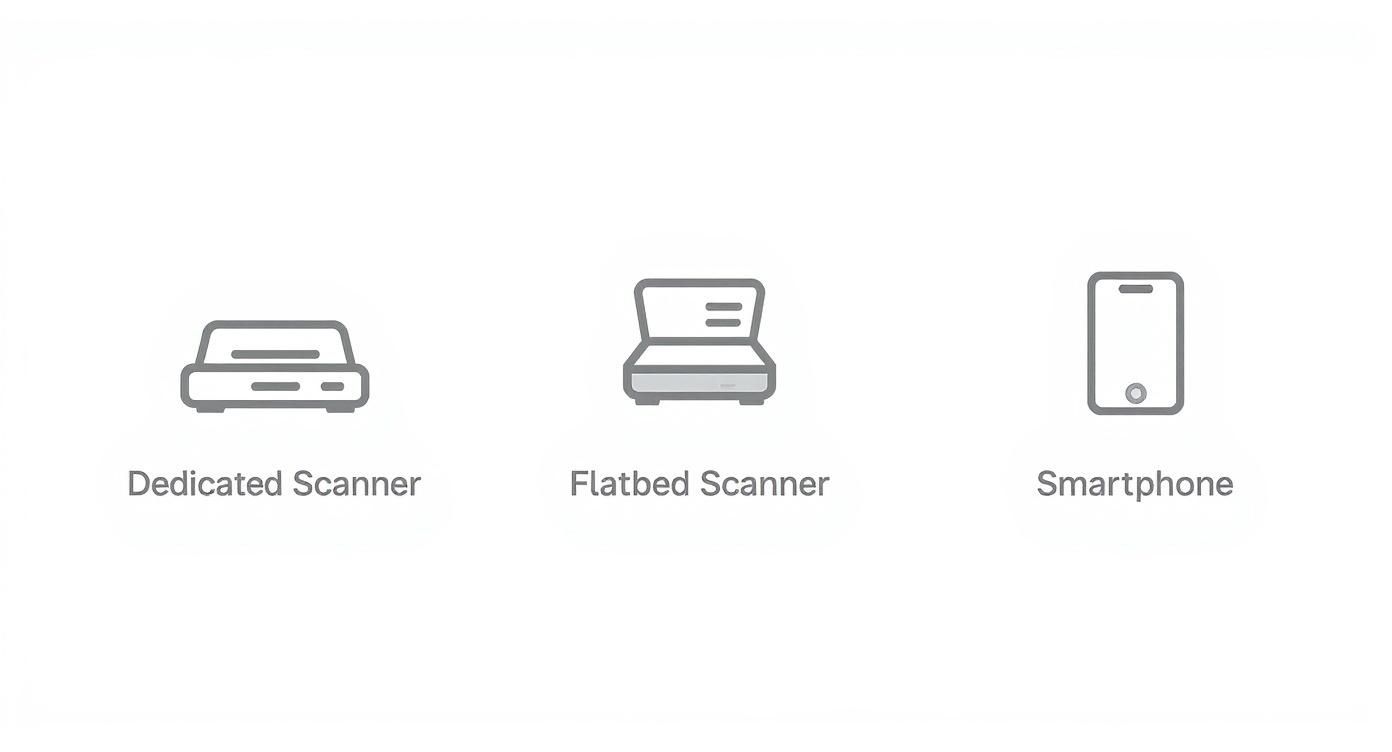
Dedicated film scanner (highest quality)
Dedicated film scanners are built for negatives and slides:
- Hold 35mm strips or mounted slides in rigid carriers.
- Capture at 3200–4000 DPI (or higher) with good dynamic range.
- Often include infrared dust/scratch removal.
If you have large archives or want gallery-quality prints, this is the gold standard. The Library of Congress recommends scanning 35mm film at 2400 DPI or higher to capture the full tonal range and avoid future rescans (Library of Congress digitization guidance).
Flatbed scanner with film holder
Flatbed scanners with a transparency unit (a backlit lid) are common in home offices:
- Use included film holders to keep strips flat and properly aligned.
- Offer good quality for 35mm and medium format negatives.
- Can also handle prints, documents, and odd sizes.
They’re slower than dedicated film scanners but ideal if you want a single device for both prints and film.
Smartphone + light source (fast and flexible)
If you don’t own a scanner, your phone can still do a solid job:
- Use a lightbox, tablet screen set to pure white, or LED panel as a backlight.
- Place the negative on the light source, emulsion side up.
- Combine with a film-scanning app that can invert color negatives and boost contrast, or use manual editing later.
Phone-based workflows are perfect for sharing and quick backups. For a polished experience later, you can always rescan the most important frames on a dedicated scanner.
3) Dial in your scanner or camera settings
Whatever hardware you choose, a few key settings determine how much detail you capture and how flexible your files will be.
Resolution (DPI) targets
For 35mm negatives:
- 2400 DPI: Good for on-screen viewing and modest prints.
- 3200–4000 DPI: Ideal for archiving and larger prints; captures most useful detail in the film grain.
Scanning once at a higher DPI is almost always better than rescanning years later. For medium format negatives, you can often choose slightly lower DPI while still getting enormous files.
Color depth and file format
- For color negatives, choose 16-bit per channel (often labeled 48-bit color) if available.
- For black-and-white negatives, choose 16-bit grayscale to capture smooth tonal transitions.
- Save archival masters as TIFF with no or lossless compression.
- Export JPEG copies for everyday sharing, email, and social posts.
Higher bit depth and TIFF files give you room to edit aggressively without banding or posterization.
Exposure and film type presets
Most scanning software offers presets for color negative, black-and-white negative, and slide film. Pick the closest match to your film stock, then:
- Enable multi-exposure or dynamic range enhancement if your scanner supports it.
- Use the preview to ensure highlights aren’t blown and shadows aren’t completely crushed.
- Adjust the histogram or exposure slider until faces and midtones look balanced.
If you’re capturing with a camera instead of a scanner, shoot RAW when possible — it’s the camera equivalent of a high-bit-depth scan.
4) Capture clean scans
With your prep and settings in place, you’re ready to digitize.
Using a film or flatbed scanner
- Place negatives in the holder, emulsion side down (usually the duller side).
- Align frames so none of the image is cut off.
- Run a preview scan and adjust crop boxes around each frame.
- Double-check focus and dust — it’s better to clean now than to retouch later.
- Start the final scan and save to a clearly labeled folder (for example,
1979-summer-trip-negatives/).
Repeat for each strip, pausing occasionally to clean the glass and holder. Dust builds up quickly during long sessions.
Using a smartphone and lightbox
- Set your phone to its highest resolution and, if available, enable a grid overlay.
- Place the negative flat on the light source, emulsion side up.
- Position the phone directly above, keeping it as parallel as possible to avoid distortion.
- Tap to focus on a key detail (like a face) and slightly underexpose if the highlights seem blown.
- Capture several frames of the same negative if needed — you can pick the sharpest later.
If you’re using an app designed for negatives, let it handle inversion and basic color correction; otherwise, you’ll do that in the next step.
5) Invert, edit, and organize your scans
Raw scans of negatives look flat, low-contrast, and often tinted orange or blue. Editing is where they come to life.
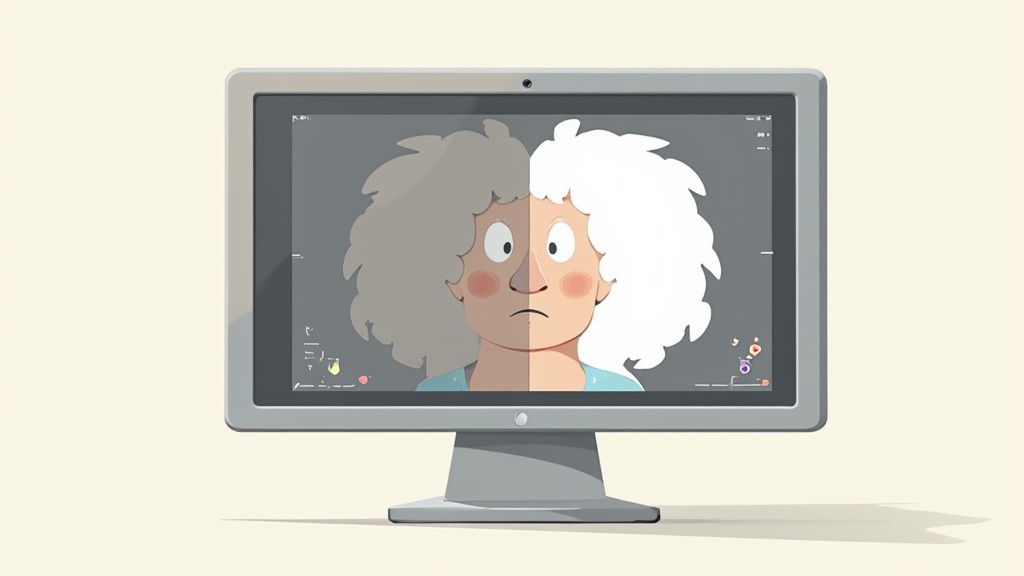
Invert and neutralize color negatives
- If your scanner software offers a color negative mode, start there — it usually handles inversion and initial color balance.
- In photo editors like Lightroom, Photoshop, or similar tools:
- Invert the image (or use a dedicated negative plugin).
- Set black and white points so shadows are deep but not crushed and highlights are bright but not clipped.
- Adjust white balance to remove strong color casts, especially from the orange mask.
Don’t chase perfection in the numbers; aim for skin tones and skies that look natural and believable.
Refine contrast, sharpness, and repair dust
Once the overall color balance looks right:
- Gently increase contrast and clarity to restore depth.
- Apply moderate sharpening — zoom in to ensure you’re enhancing detail, not noise.
- Use a spot healing or clone tool to remove remaining dust spots and small scratches.
For heavily damaged frames (tears, deep scratches, fading), it may be worth using specialized restoration tools or following our dedicated photo restoration guide.
Name and back up your files
Scanning is only half the job; future-you needs to find these photos easily:
- Use consistent file names, such as
YYYY-location-roll-frame.tif. - Group related images into clearly labeled folders by year and event.
- Keep at least two backups — for example, an external drive plus a reputable cloud service.
Once organized, your film history becomes something you can browse and share in minutes, not a mystery box in the closet.
Troubleshooting & pro tips
-
Scans look soft or slightly out of focus
Ensure the film sits flat and at the correct height in the holder. Some scanners allow you to adjust holder height; test small increments until the film grain appears crisp. -
Persistent dust in every frame
Clean both the scanner glass and film holder regularly, not just the film itself. Enable infrared dust and scratch removal if your scanner supports it. -
Color casts that won’t go away
Try using a curves adjustment instead of only sliders. Set neutral points using areas that should be gray or white (like clothing or clouds), then refine per channel. -
Very dense or very thin negatives
These may need multiple passes or manual exposure tweaks in the scanning software to pull out useful detail. Bracket a few frames at different exposure settings and pick the best. -
Curled or wavy film
Place strips in archival sleeves and press them under a heavy book for a day or two before scanning, or use film holders designed to hold curled strips flat.
What's next
Once your negatives are safely in the digital world, you can do far more than just store them:
- Clean up fading, dust, and scratches using our photo restoration guide.
- Learn how to preserve old photos and prints so the physical originals last longer too.
- Explore creative options like colorizing black-and-white photos to help younger family members connect with older images.
If you’d rather skip complex software, try the free PhotoScanRestore demo. It’s designed to take your scans — whether from film or prints — and automatically rebalance color, reduce noise, and repair minor damage while preserving the original feel. When you’re ready to save results and build a shareable archive, create a free account.
FAQs
What resolution should I use to scan 35mm negatives?
For most families, 3200–4000 DPI is a safe, future-proof choice. It captures enough detail for large prints and cropping while keeping file sizes manageable. If you only need small prints or on-screen viewing, 2400 DPI is acceptable.
Why do my scans look orange or blue after inversion?
Color negative film has an orange mask that must be removed digitally. If your software misinterprets it, you’ll see strong orange, blue, or cyan casts. Use white balance tools and curves per channel to neutralize the cast until neutrals and skin tones look correct.
Is scanning black-and-white negatives different from color?
The handling and cleaning process is identical, but editing is simpler. Black-and-white negatives don’t have an orange mask, so you can work entirely in grayscale, focusing on contrast and tonal range rather than color balance.
Can I get good results scanning negatives with a smartphone?
Yes — especially for sharing and smaller prints. A sharp phone camera, stable setup, and even backlight can produce surprisingly strong results. For the very best dynamic range and very large prints, a dedicated film or flatbed scanner still has the edge.
How should I store my negatives after scanning?
Place them in archival polypropylene or polyester sleeves, label each strip clearly, and store them upright in a cool, dry, dark place. Avoid attics, basements, and any location with wide swings in temperature or humidity.
Do I need to keep the negatives once everything is scanned?
If space allows, it’s wise to keep them. Negatives remain a valuable physical master that future technology may be able to scan even better. Properly stored, film can last for decades after digitization.
Editor’s note: This guide is part of our scanning and restoration series alongside how to scan old photos, how to scan slides and negatives, and our in-depth photo restoration guide.