Restoration Guide
How to Fix Faded Wedding Photos
Bring faded wedding photos back to life with safe scanning, simple color fixes, and a free restore demo before you edit the original.
Published May 8, 2026
Before you start
- Scan or photograph the wedding print before you try any edit.
- Fix the fade in this order: light, crop, color cast, contrast, small marks.
- Keep a natural version. Wedding photos can look strange if the dress, skin, or flowers become too bright.
- Try a free restore first if you want to see whether the photo is worth deeper editing.
Faded wedding photos are different from ordinary old prints. They usually carry faces, clothes, flowers, handwriting, and family history in one frame, so the goal is not to make them look brand new. The goal is to make the people easy to see again while keeping the softness of the original day. This guide walks through a safe beginner workflow: make a clean digital copy, correct the color gently, bring back contrast, remove small marks, and save both an archive version and a shareable version. If you are working through a larger family box, pair this with our restore old photos hub and iPhone scanning guide so every important print gets the same careful treatment.
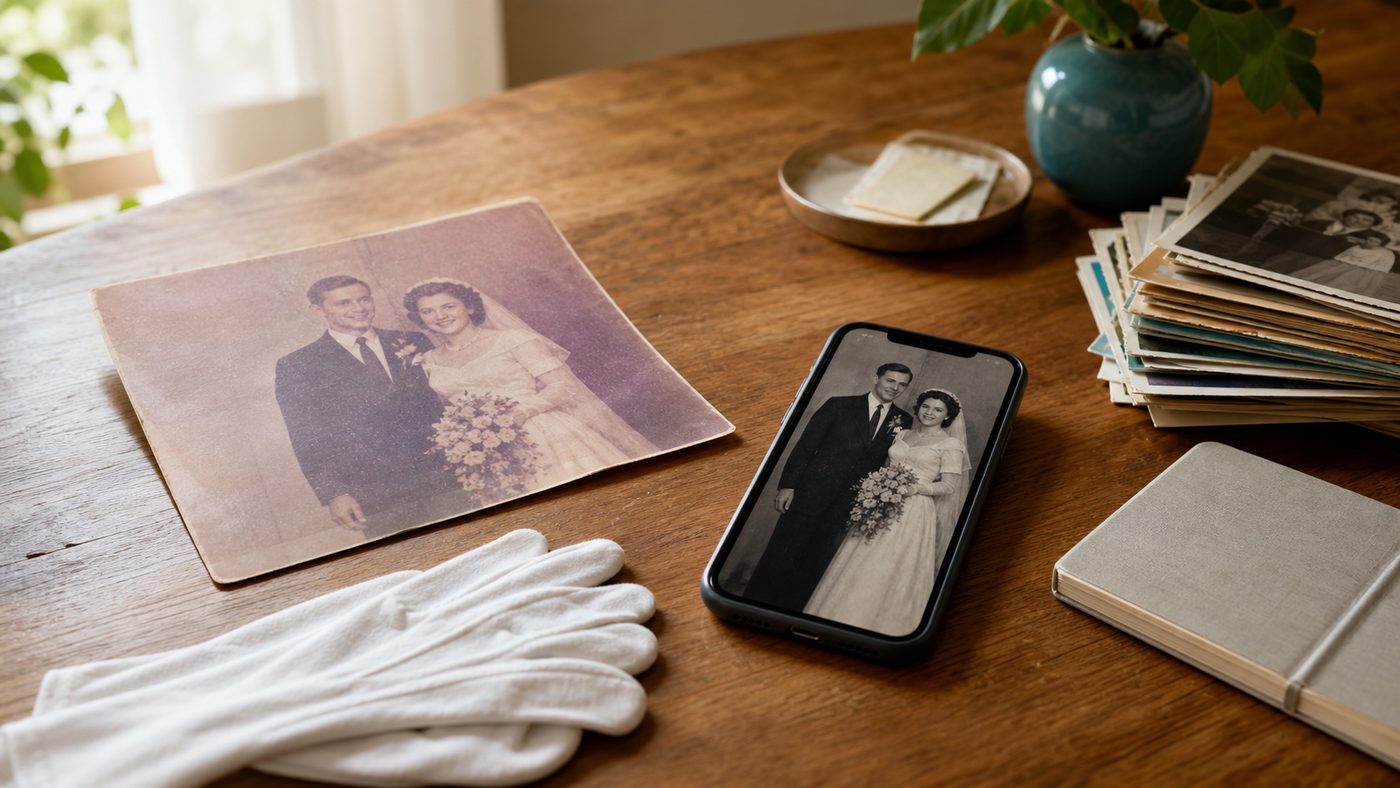
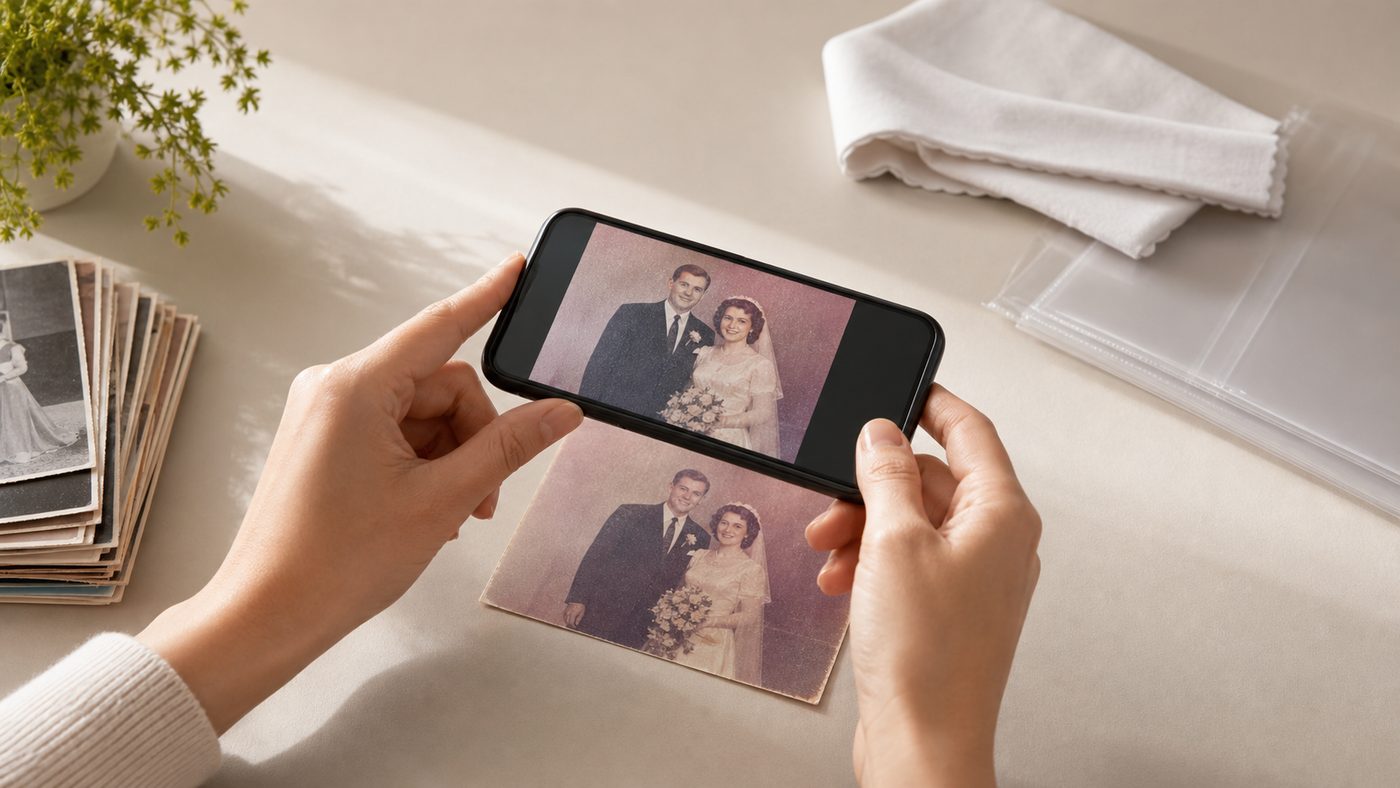
1) Make a clean scan before editing
Start by creating a digital copy. Do not edit the only file you have, and do not write on or flatten the original print to make it easier to scan.
For most faded wedding photos, a phone scan is good enough if you control the light:
- Place the photo on a matte surface near a window.
- Turn off flash.
- Hold the phone parallel to the print.
- Take two or three captures so you can choose the sharpest one.
- Save the untouched scan in a folder named
originals.
If the print is glossy, curved, or stuck in an album, read our glare removal scanning tips before you continue. A better scan usually beats a stronger edit.
2) Fix the crop and tilt first
Before touching color, straighten the photo and crop away the scan background. This makes every later adjustment easier to judge.
Keep the full dress, bouquet, and any handwritten border if they matter to the story. A tight crop can look cleaner on a phone, but old wedding photos often have context in the edges: the church doorway, the car, the garden, or relatives standing just outside the main pose.
If the photo has a torn or badly stained edge, make two versions:
- Full archive crop: keeps the whole historical record, including borders and notes.
- Clean share crop: removes distracting edges for messages, email, or small prints.
3) Correct the yellow or pink fade gently
Many wedding prints fade yellow, pink, or brown. Start with small color moves instead of one big filter.
In a photo editor, look for controls like white balance, temperature, tint, color, or auto-enhance. Use the dress, shirt, veil, or paper border as your guide. If a white dress turns blue or skin turns orange, pull the edit back.
For black-and-white wedding photos, do not force color unless you want an interpreted version. Try a clean monochrome restore first, then use our photo colorizer only on a duplicate. Colorization can be lovely, but it is a creative guess rather than a historical record.
4) Bring back contrast without crushing details
Faded wedding photos often look flat because the shadows lifted and the highlights lost shape. Add contrast slowly.
Good signs:
- Eyes and hair become easier to see.
- The dress still has fabric detail.
- The background does not turn harsh or crunchy.
- Faces still look like real people.
If the scan is soft, do not over-sharpen the whole image. Use our image upscaler or face-focused enhancement only after the color and contrast feel natural. Sharpening too early can exaggerate dust, paper grain, and scratches.
5) Remove small marks, not the character
Clean obvious dust, specks, and little scratches. Leave gentle paper texture alone unless it distracts from the people.
For beginner editing, use a healing or retouch brush in short taps. Avoid dragging across faces, lace, hands, or flowers, because those areas can smear quickly. If a scratch crosses an eye or mouth, make a copy and work slowly at high zoom.
Severe cracks, missing corners, water damage, or torn faces may need a careful restore pass instead of hand edits. That is a good moment to try the free PhotoScanRestore demo and compare the result before spending time manually repairing the file.
6) Save an archive version and a family version
When the photo looks right, save two files:
- Archive version: full size, highest quality, no extra crop.
- Family version: smaller JPEG for messages, email, or shared albums.
Keep the original scan, the restored file, and any edited project file in the same folder. The Library of Congress recommends preventive care for photographs, including careful handling, low light exposure, and stable storage conditions in its photograph care guidance. That matters even after the digital copy is finished: the original print is still the source.
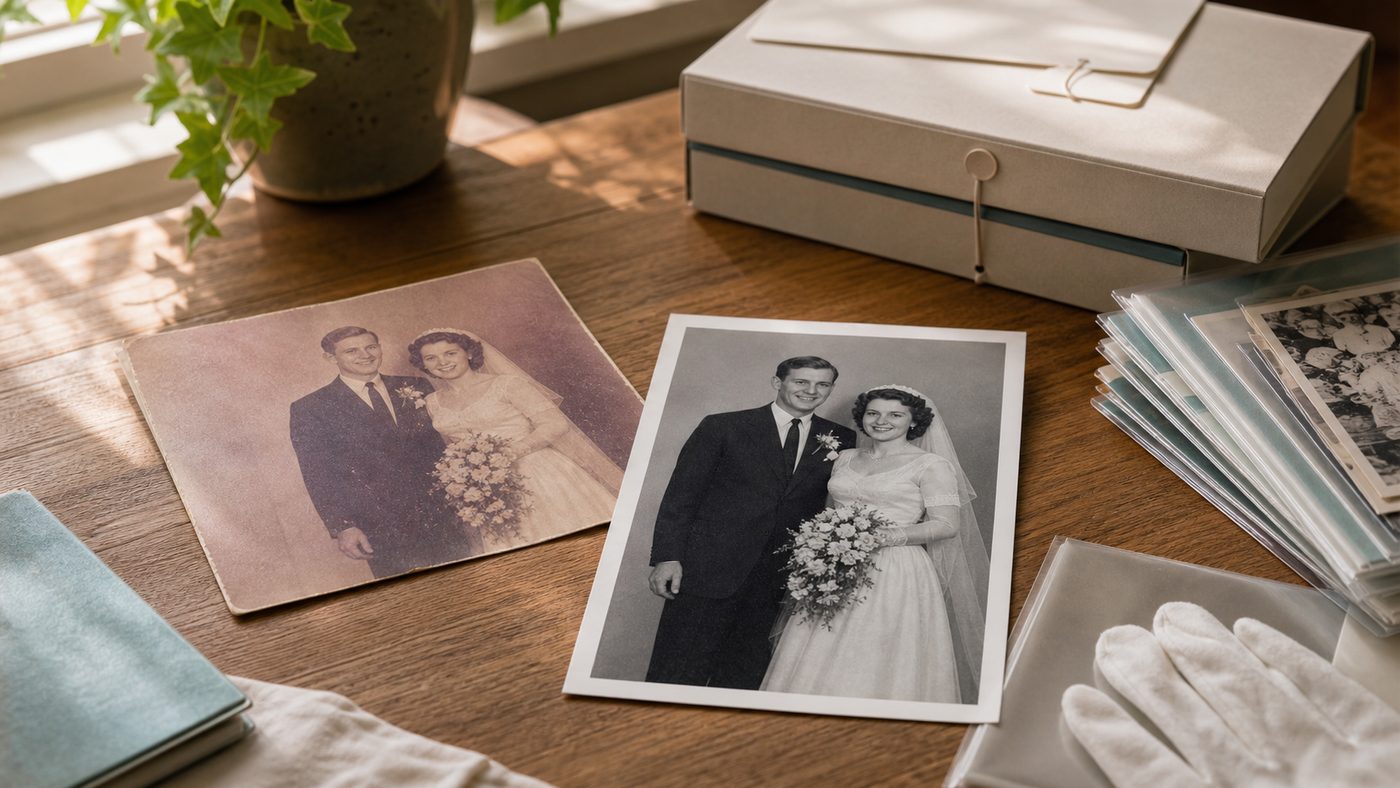
For long-term storage, use acid-free or photo-safe sleeves and keep the real print away from damp lofts, garages, bright windows, and sticky album pages. Our preserve old photos guide has a fuller checklist.
What's next
If you only have one special wedding photo, try the free demo and see whether the restored version feels natural enough to share.
If you have a full album, start with five important prints first. Scan them in the same light, restore them the same way, and use that small batch to decide your style before processing the whole box.
Want the step-by-step restoration path for other family prints too? Continue with our beginner guide to restoring old photos.
FAQs
Can I fix a wedding photo that has turned yellow?
Usually, yes. Start with white balance or tint controls, then add gentle contrast. Use the dress, shirt, veil, or border as a reference, but avoid making skin tones too orange or too pink.
Should I colorize a black-and-white wedding photo?
Only on a duplicate. Keep the black-and-white scan as the main record, then create a colorized version as an interpretation for sharing.
What if the dress loses detail when I brighten the photo?
Lower the highlights or whites, then add contrast through midtones instead. Wedding dresses can clip quickly, especially in faded prints.
Can I restore a photo stuck inside an old album?
Do not pull it out if it resists. Scan or photograph the whole album page, then crop the photo digitally. Forcing it loose can tear the print.
Is a phone scan good enough for a wedding photo?
Yes for sharing and many restores, as long as the photo is sharp, evenly lit, and glare-free. Use a flatbed scanner for tiny prints, heavy texture, or planned enlargements.
Should I keep the original faded photo?
Yes. Store it safely even after restoration. The digital version is for everyday use; the physical print is still the family artifact.
Editor’s note: This article is part of our photo restoration series. For the full capture workflow, start with the iPhone scanning hub.